How to parse JSON object and get variable values in Power Automate(flow) - Part 2
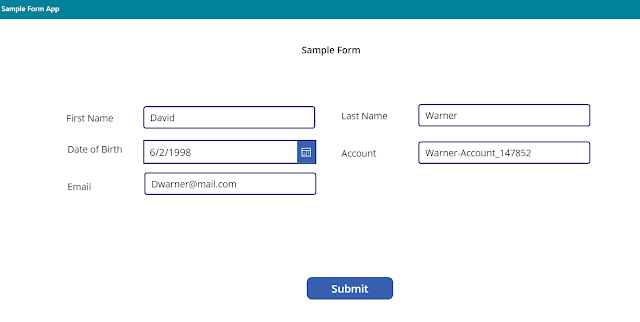
This is the second part of my previous post. If you just visited this page, I highly recommend that you read the first part to get a clear understanding of how we pass field values from a canvas app to Power Automate flow via a JSON object.
Now that we are all caught up, let's begin..
As of now, we are able to get a JSON object such as below as the output of our flow:
[{"account":"jdoe123account","dob":"2/19/2020","email":"jdoe@mail.com","fname":"John","lname":"Doe"}]
Now, our next step is to retrieve individual values from this object. For this, we need to update the "Parse JSON" action in flow.
Open the power app in design studio. Select the button and under "Action" tab, select "Power Automate"
You will now see the flow(FormSubmitFlow) that we created last time.
Update "Parse JSON" action
Open Parse JSON action, now let's edit the schema to get the required values.
Click on "Generate from sample". This will open another window where you can enter a sample object data.
Let's first see what's being passed onto the Parse JSON action: You can go to a previous run and see the actual parameters that are being used.
In this case, the Object is being passed with "\" character which will cause errors when using JSON parse action.
Therefore, we can leave this action and create a string variable : "ObjString" and assign PowerApps trigger body as the value.
Now we can perform any text formatting operation on the ObjString. Let's add another Parse JSON action to our flow.
We will now use the cleaned up string as the input for this step.
Replace function can be used for this: replace(variables('ObjString'),'\','')
For the schema, click "Generate from sample" and paste the previously received email body as the sample payload. Click done.
Click on "Generate from sample". This will open another window where you can enter a sample object data.
Let's first see what's being passed onto the Parse JSON action: You can go to a previous run and see the actual parameters that are being used.
In this case, the Object is being passed with "\" character which will cause errors when using JSON parse action.
Therefore, we can leave this action and create a string variable : "ObjString" and assign PowerApps trigger body as the value.
We will now use the cleaned up string as the input for this step.
Replace function can be used for this: replace(variables('ObjString'),'\','')
For the schema, click "Generate from sample" and paste the previously received email body as the sample payload. Click done.
This should now parse the object and give each variable value separately.
Let's test this flow now. I will add the variables to email body.
Important - As soon as we start adding variables into any action, it will be nested within "Apply to each" container.
Our JSON schema will explain this behavior.
Now you would have noticed that each submission is an item in the array. Moreover, any flow action that has an array as the input, will be repeated for each item of the array.
Let's add the dynamic fields to the email template.
Time to test the flow!
Email Notification:
You can try this method and pass various collections/ parameters from PowerApps to PowerAutomate flows.
Remember - This could give different results depending on your schema and actions. Always use previous runs to check how the values are passed and then format accordingly.
Happy Learning!
Let's test this flow now. I will add the variables to email body.
Important - As soon as we start adding variables into any action, it will be nested within "Apply to each" container.
Our JSON schema will explain this behavior.
{
"type": "array",
"items": {
"type": "object",
"properties": {
"account": {
"type": "string" ......
Let's add the dynamic fields to the email template.
Time to test the flow!
Email Notification:
You can try this method and pass various collections/ parameters from PowerApps to PowerAutomate flows.
Remember - This could give different results depending on your schema and actions. Always use previous runs to check how the values are passed and then format accordingly.
Happy Learning!


Comments
Post a Comment