Authenticate Graph API Using Power Automate - Part 1 (Configure application access in azure active directory)
In order to use Graph API, we need to first set up authentication.
Graph API only supports below methods of authentication:
Permission type Permissions (from least to most privileged)
Delegated (work or school account) Group.ReadWrite.All
Graph API authentication is enabled through Azure Active Directory.
Here are the steps:
1. Go to : https://portal.azure.com/
2. Click " App Registrations" > "New Registration"
3. Give a name to the new app, select the relevant account type and click "Register"

Once the app is provisioned, you will be able to see the App ID, TenantID, ObjectID and other specific fields for the Azure App.

Now we need to create a client secret for this app. Click on "Certificates and secrets".
 Enter the name for your client secret and set expiration as needed. In this case, I'm setting it to : "Never"
 This will generate the client secret. You need to copy this and save it as you won't be able to see it after that.

We need below fields for authentication now:
1. App ID
2. Client Secret
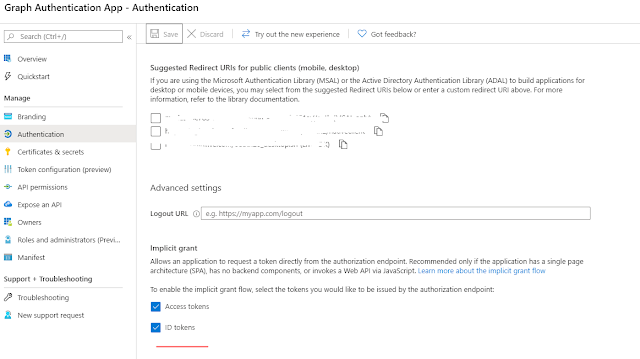
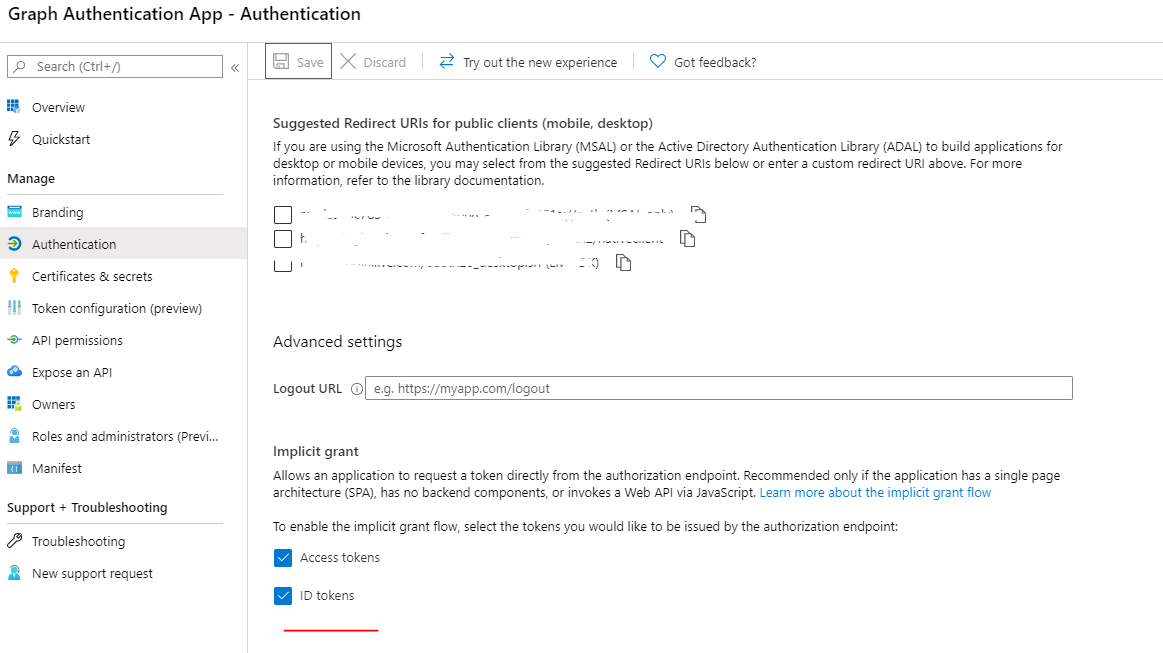
We also need to set up implicit grant for ID and Tokens.
Now we need to setup API permissions to the new app we created.
Click "Add a permission" and Select " Group" > "Group.ReadWriteAll" and give admin consent. - You will need admin access to grant admin consent.

Once this is done, we can go ahead and setup the Graph API calls.
In my next post - , let's discuss how to authenticate graph API using power automate(flow) and parse the auth token.
Happy Learning!
Graph API only supports below methods of authentication:
Permission type Permissions (from least to most privileged)
Delegated (work or school account) Group.ReadWrite.All
Graph API authentication is enabled through Azure Active Directory.
Here are the steps:
1. Go to : https://portal.azure.com/
2. Click " App Registrations" > "New Registration"
3. Give a name to the new app, select the relevant account type and click "Register"

Once the app is provisioned, you will be able to see the App ID, TenantID, ObjectID and other specific fields for the Azure App.

Now we need to create a client secret for this app. Click on "Certificates and secrets".


We need below fields for authentication now:
1. App ID
2. Client Secret
We also need to set up implicit grant for ID and Tokens.
Now we need to setup API permissions to the new app we created.
Click "Add a permission" and Select " Group" > "Group.ReadWriteAll" and give admin consent. - You will need admin access to grant admin consent.

Once this is done, we can go ahead and setup the Graph API calls.
In my next post - , let's discuss how to authenticate graph API using power automate(flow) and parse the auth token.
Happy Learning!

Comments
Post a Comment